December 29, 2012

Three-Minute Cranberry Galette


Today was a pie-making day. And I had a special friend to keep me company.


Her name is Eloise. She is a guest with us for a few days and I have fallen head over heels in love with her. Now, take a deep breath before you look at the next picture.
Look at that FACE! Although I like to think of myself as more of a big dog person, as you may remember, it's not the first time a little dog has captured my heart. At any rate, everytime I looked down from pie-land, there was Eloise, sitting very quietly and very very close. 

I started off the day making tourtière, a traditional Québecois meat pie eaten around this time of year (think of a mountain of spiced ground pork and beef in a buttery pie crust, not for the faint-hearted). I'll share the recipe with you next year when I am off my "video sabbatical" because it's a video-worthy one. Since I was following a recipe yielding 6 meat pies (yes, Quebecers used to have BIG families!) and I only made 2 pies, I ended up with extra pie dough. Convenient since there was a sad bag of cranberries and some squash sitting in the fridge, begging to be used up. The squash pie was nothing to write home about. But the cranberry galette was delightful and since I have a feeling I'm not the only one with a spare bag or two of cranberries leftover from Christmas, I thought I'd share this recipe, which is a long-time favourite of mine and just about the easiest dessert I know how to make. It literally takes 3 minutes to prepare (minus the pie dough).


3-MINUTE CRANBERRY GALETTE

1 batch of your favourite pie dough (ideally a very buttery & flaky one)
About 2 to 3 cups of cranberries
About 1 cup cane sugar (the cranberries are quite tart and need the sugar)
1 tbsp butter

Roll out the pie dough. Place on a greased cookie sheet. Place your washed and dried cranberries in a mound on the pie crust. Sprinkle the sugar all over. Fold the edges of the dough towards the centre, leaving a circle of cranberries poking through (about 3 to 4 inches in diameter). Tuck the tablespoon of butter on top of the cranberries. Bake in a 350 F oven until cranberries are bubbling and crust is golden, about 30 minutes. Serve warm with a dollop of crème fraiche.


Best enjoyed with a friend by your side.


December 23, 2012

Egg Nog Crème Brûlée

Egg nog is one of those heavenly things. And by golly, so is crème brûlée. I recently had a brain explosion when I realized you can put the two together. Actually, I have to confess that up until very recently, I didn't think crème brûlée was easy to make at all. Although I love making custards and crème caramel and basically anything with cream and eggs, I have had crème brûlée block all of my life up until now. Weird, considering my obsession with French cooking, and my French Canadian roots. It's because I don't have one of those little chef blow torches to burn the sugar. And even if I did, torches freak me out just a little bit. But I just clued in to the fact that you can simply burn the sugar under your oven grill. Dah dah dah. My life has been transformed. Now unfortunately, this means I went a little sugar-burning happy, as you can see in the photo. You only need to caramelize the sugar until it is golden and bubbling with a few flecks of black. Still, a very burnt sugar crust is also delicious.


Now here's a little French trivia for you: crème brûlée means burnt cream. And egg nog in French is "lait de poule", which literally translates as hen's milk. So I have been enjoying referring to my brûlée as HEN'S MILK BURNT CREAM!

On another note, it was recently suggested to me that I should provide an explanation for the absence of videos on this blog as of late. Well, I have been on the road a lot recently as I am in the process of leaving my job in Toronto and moving into a new phase of my life (one that will involve much more cooking and farming and video-making, so do stay tuned in 2013... ).  In the meantime, I have been living in various extremely kind people's homes (and kitchens) and taking a little break from video-making. So I leave you with a re-run of my Christmas video from last year and my warmest wishes to you and yours for a relaxing, joyful, and delicious holiday season. See you in the new year!


EGG NOG CRÈME BRÛLÉE

2 cups (500 ml) heavy cream (35% whipping cream)
6 egg yolks
1/3 cup fine cane sugar
1 tsp vanilla
1 tbsp. rum
1 1/2 teaspoon freshly grated nutmeg

*1/3 cup superfine cane sugar for the topping (caster sugar)


*The best sugar for burning under the grill is superfine sugar. It can be hard to find it but it's easy to make at home. Simply put the sugar in a blender of food processor and pulse until the sugar is fine but not powdery.


In a large mixing bowl, beat the egg yolks and sugar until silky and ribbony. Add rum, vanilla, and nutmeg and whisk well. 


In a small saucepan, gently heat the cream on low until just before it boils. While whisking continuously, pour the cream onto the egg mixture. Don't stop whisking until it starts to thicken a bit (this signals that the eggs are starting to cook). 


Pour into small individual ramekins (or one large one). Place these on a baking pan filled with enough water so that it comes up to halfway up the exterior of the ramekins. Bake in this water bath for about 45 minutes at 300 F. It should be set but still quite wobbly. Cool the custard to room temperature (chill it in the fridge if not using right away). 


When ready to serve, if removing from the fridge, allow ramekins to come up to room temperature for a few minutes. Using a clean cloth, pat the surface dry of any condensation. Sprinkle about one teaspoon of your fine sugar to evenly cover the surface of each custard. Place under broil on the highest possible rack in the oven. Broil for about 5 to 10 minutes, rotating the ramekins a couple times to ensure even caramelization. An upside-down pan can also be used to bring the custards even closer to the top grill to speed up the process. Be careful not too over-burn, once the caramel is golden and bubbling, remove from the oven and allow the sugar to harden and cool slightly before serving. Can be served hot or cold.

December 17, 2012

Brussels Sprouts Gratin in Cream and Blue Cheese

This recipe is so decadent it might win over even the most adamant brussels sprouts hater. It's also a great holiday dish (I like to sprinkle pomegranate seeds on mine for a festive presentation) and it's a loose adaptation of a recipe from my first-ever food blog crush, Orangette, which I remember discovering back in the day when I didn't even know what a blog was. Molly Wizenberg is one of my all-time favourite writers and I love when she describes how her stomach "literally coos like a baby" at the thought of cream-braised brussels sprouts and that she could "lap up a plate of this stuff like a cat with a bowl of milk". Besides, how can one resist trying the recipe that turned her from a cream-hater to a cream-lover? 

I decided to turn my version into a gratin with the addition of blue cheese because I've always loved the deep flavour it adds to creamy sauces. I used Castello blue cheese which I recently learned is GMO-free (hurrah!). I opted for their "mellow blue cheese" and found it to be velvety and not too overpowering in this dish.

This summer, my boyfriend and I grew green and purple brussels sprouts in our garden. I had never seen the purple kind before, they are quite dashing! Those brussels sprout plants are now the last soldiers standing in our garden, which has for the most part been put to bed for winter. They are bravely withstanding the cold wintery winds of mid-coast Maine, and patiently waiting to be harvested for Christmas dinner. I miss those little guys (and the tall human guy who planted them too, I miss him a LOT). But since I am still in the city, and I wanted to bring this dish to a dinner party yesterday, I had to suck it up and buy my brussels sprouts at a store. (gasp!) But in just a few days time I'll be back in Maine and I can't wait to make this recipe again with my own homegrown purple brussels sprouts and my sweetheart by my side!


BRUSSELS SPROUTS GRATIN IN CREAM AND BLUE CHEESE
Adapted from Molly Wizenberg's Cream-Braised Brussels Sprouts

(Feeds 6 to 8 hungry people)

2 pounds brussels sprouts
1/4 cup white wine
1 1/2 cup heavy cream
2/3 cup crumbled blue cheese
1/2 cup grated parmesan

Wash and trim the brussels sprouts and cut them in half. In a medium pot, cook the brussels sprouts in the wine on medium heat for about 5 minutes or until all the wine is gone (watch closely that they don't burn). Transfer them and into a buttered baking dish. Crumble the blue cheese and pour the cream on top. Add the grated parmesan. Bake covered in a 350 F oven for about 30 minutes. Remove the lid and bake for another 10 minutes or until top is golden. If you want a darker top, you can broil it for the last minute but I over-broiled mine slightly, so don't burn it like I did, one single minute of broiling should be plenty! Garnish with pomegranate seeds if desired.

*One little eco-cooking tip: I try to avoid using aluminum foil whenever I can, if you don't have a lidded baking dish, simply put a cookie sheet on top of the pan to cover it up without using aluminum foil.

December 04, 2012

Almond & Apple Butter Thumbprint Cookies (gluten-free!)

For me, getting in the mood for Christmas involves baking copious amounts of cookies. As a kid, around this time of year, I would get on the greyhound bus to spend a weekend with my cherished Grammie and we would bake cookies from the moment I arrived until the moment I left. It was our annual Christmas baking bonanza and I had her all to myself, a rare treat! As we piled tin after tin of cookies into the secret "Christmas cookie cupboard", we would listen to carols and get into a festive spirit. One of my grandmother's favourites, a family classic, were her thumbprint jelly cookies, or as they are also called, bird's nest cookies: a nutty cookie with a jelly-filled indentation in its centre. Recently, I've been hanging around some gluten-free friends, and I wanted to adapt these for them, putting to use some of the apple butter I made this fall.


I imagined a chubby, almondy cookie and after a couple of batches, I got what I had aimed for: a healthy holiday cookie that is crispy on the outside and chewy on the inside, deliciously flavourful, and gluten-free and sugar-free (sweetened only with maple syrup and apple butter).


Did you know how easy it is to make apple butter?! I made it for the first time this fall, using the most basic recipe I could find. I simply cooked down a huge pot full of chopped apples for almost a whole day on the woodstove until they went beyond the apple sauce stage and crossed over into that thick dark caramelly world of apple butter. Add a few sprinkles of cinnamon and cloves and voila. Spread it on buttered toast in the morning and it will win you over.


I'm lucky that my family lives near an abandoned orchard in Nova Scotia and every fall, we have a tradition of rescuing these lonely apples from falling to the ground, unused.


They're free, they aren't sprayed with pesticides, and they make the most exquisite (a bright rosy pink!) apple sauce. How much better can it get? Now that I'm back in the big city for a bit, I treasure the jars of apple sauce and apple butter I brought here with me, they taste like the East Coast and the wind and the leaves and sunshine back home.


Now before I share this recipe, I have a special treat for you that will warm your heart and give you a chuckle. (And also fulfills the promise I made of sharing cute animal videos with you when I don't have time to make cooking ones). So. Dogs need cookies too, especially around the holidays, and my friend Val has just put up a fabulous blogpost sharing a winning doggy biscuit recipe (just in time for a fun homemade Christmas present for all your canine friends). I happened to be there with my camera when she gave her spirited pups, Cracker and Mash, their first tastes of biscuit, fresh out of the oven. And here is what that looked like:


I can only hope that biting into my almond cookies will generate a fraction of the exuberance displayed by Cracker and Mash. Please do make these and let me know if you did a happy dance :-)


CHEWY GLUTEN-FREE ALMOND THUMBPRINT COOKIES

Makes 20 medium-sized cookies
*Feel free to substitute your favourite jam or jelly for the centre part.

1 1/2 cup ground almonds (almond flour)

1/3 cup butter, at room temperature (I used goat butter, my new favourite butter)
1/2 cup maple syrup (more to taste)
1 egg
1 1/4 cup brown rice flour
1/4 cup tapioca (or arrowroot) flour
1/2 tsp. baking soda
1/2 tsp. salt
1 tsp. almond extract
1 tsp. cinnamon
About 1/3 cup apple butter (or your favourite jam or jelly)
About 20 almonds to decorate the cookies

Mix the ground almonds and butter together, then add the maple syrup, beaten egg, and almond extract. Mix all the dry ingredients together in a separate bowl and incorporate into the wet almond mixture. Mix until smooth. Chill in the fridge for 30 to 60 minutes. Roll into balls and flatten them slightly on a greased cookie sheet. With your thumb, make an indentation in each cookie. Place about 1 tsp apple butter (or jelly / jam) in each indentation and top it off with a whole almond. Bake at 350F for about 15 minutes or until the edges are crisp but the centre still soft. Let them cool on the pan a few minutes before transferring to a cooling rack.


November 16, 2012

Poutine, mon amour

Hellooooo out there. My apologies for the long absence.

I've been busy working on my thesis film about genetically engineered foods and just returned from a long hard shoot in San Francisco where I was filming the vote on Proposition 37 (the one to label GMOs). The proposition was defeated by a slim margin: 47.2% (voted yes) to 52.8% (voted no). I could write a very long blogpost with my thoughts on it all, but for now (just for now), I'll spare you all as I digest what I've just experienced and reflect on how to thoughtfully put it all into a film worthy of contributing to the debate. 

In the meantime, there is poutine to talk about. 


It's been quite thrilling to see that over the years, the awesomeness of poutine has gradually overflowed beyond the borders of my birth province of Québec, into other Canadian provinces, and even charmed its way into our neighbouring states to the south. I love it when the tables are turned and Americans get to eat Canadian fast food! I was pleased to see when I first arrived in Maine that most people not only knew what it was, but also had an appetite for poutine. I even ordered one of those uber-trendy gourmet foie-gras poutine at my favourite local restaurant (thought I died and went to heaven). But what caught me off guard, and confirms that poutine is successfully wooing the world over is that people as far away as San Francisco knew what it was. In my missionary-like efforts to spread the deliciousness onto other continents, I even once made poutine entirely from scratch while visiting friends in Tunisia. There are few things that make my Québecois pride and patriotism truly shine through. But poutine is one of these.

Granted, the idea of greasy French fries smothered in brown gravy and cheese curds does not appeal to everyone. It is um, on the heavier side of the spectrum to say the least. But I grew up on this stuff. I fondly remember walking with my mom and baby sister to the Cantine d'Amour, when we lived in Matane, Québec, ordering their biggest poutine and eating it on the spot. Later, when my family moved to Nova Scotia and the wonder of poutine hadn't hit those shores yet, my mom would make it at home and we would have Québec nostalgia. 


Since we harvested our potatoes this week, I figured it was an opportune time to make some homemade (GMO-free!) poutine. Especially since my boyfriend's dad pointed out where I could find what may be the finest and freshest cheese curds in Maine. So all that was left was a good gravy. And luckily for me, Saveur magazine just put out this fabulous video showing how to make a perfect vegetarian gravy, featuring the lovely Todd Coleman. (I'm not vegetarian so I cheated and actually used some organic chicken broth I had kicking around instead of water, but otherwise, I stuck to this marvellously rich and flavourful recipe. Thank you Saveur!)


POUTINE (The 3 building blocks)
-A couple pounds of the best French fries possible 
(yes, this means homemade, trust me it's worth the time and effort...  but if dire, and I mean really dire, circumstances are preventing you from being able to make your own, then ok, you can use the frozen ones from the store... or if French fries aren't your thing, simply use baked potatoes instead)

-About 1 pound of the freshest squeakiest cheese curds 
(in a pinch, grated mozzarella will do, but it won't be the same)

-About 3 cups of good thick homemade gravy 
(the stuff from a can should only be used under dire conditions, otherwise, to be avoided at all cost... get experimental with it too: there are some great gravy recipes out there such as ginger miso gravy, onion guinness gravy...)

Even though most French fries recipes suggest using Russet potatoes, I made ours with a variety we grew called Purple Viking, fried them up in peanut oil, and they turned out great. The amounts of fries, gravy, and cheese are really up to personal taste. The cheese curds should be covered in piping hot gravy so they melt. That's about all the poutine wisdom I have to share...  Just combine the 3 ingredients together on a plate, and enjoy!

October 07, 2012

Salted Pumpkin Caramels


Here's something you won't see too often on this blog: a candy recipe. But I am completely smitten with these chewy caramels that taste like salty butter and pumpkin pie and all things cozy and autumnal. So here you go...


I am not much of a candy person. My sweet tooth is very directionally and enthusiastically aimed at the cookies / cakes / anything-made-with-dough category. But as a kid, I loved those little square, plastic-wrapped caramels... you know the ones people give out on Halloween? My mom wasn't big on sugary treats, in fact there was a time when I wasn't allowed to eat anything with refined sugar in it. Only honey, maple syrup and natural sweeteners were permitted. She relented one Halloween when my friend's parents accused her of child cruelty. (LOL, thanks friend's parents!) As a result, I was not as accustomed to sugar as some kids, and I remember sitting with a bag of Halloween treats, surrounded by those crinkly plastic caramel wraps, and one serious sugar hangover.


Since we recently harvested our pumpkins, the sight of this recipe from Food 52 got me whipping out the candy thermometer and getting down to caramel-making business in no time. And since today is Canadian Thanksgiving (my first time spending it in the United States), I wanted to share a pumpkinny recipe with you all.


These little guys were easy to make, except for the part when you're boiling the caramel and waiting for it to reach candy temperature. I got impatient and kept thinking I must be doing something wrong since it was taking for-EVER, but once temperature was finally reached and the caramel poured and cooled, it was an act of pure pleasure to slice through them and see that lo and behold, they had turned out perfectly. So be patient and don't worry if it's taking a while, even more than 30 minutes. 


I did make one key change to the original recipe which calls for part corn syrup, and part maple syrup, because you may remember how I feel about corn, so I opted to forego the corn syrup and use all maple syrup instead. I was initially worried it might skew the texture, but I did it anyway and the caramels turned out beautifully.


If there's one pumpkin dessert you make this fall, please make it be this one. I guarantee you won't regret it. And if you don't own a candy thermometer, it is worth going out and buying or borrowing one just to make this recipe. Seriously.


SALTED PUMPKIN CARAMEL
Adapted from Food 52  (and by the way, the genius who invented this recipe deserves a gold medal and good karma for ever and ever)

This recipe makes approximately 64 1-inch caramels

  • 3/4 cup pumpkin seeds (pepitas)
  • 1 1/2 cup heavy cream (35% or whipping cream)
  • 3/4 cup pumpkin puree
  • 1 1/2 tsp. pumpkin pie spice (or 1/2 tsp. cinnamon, 1/4 tsp. each ginger and nutmeg, and 1/8 tsp. each allspice and cloves)
  • 2 cups white sugar
  • 1 cup maple syrup
  • 1/4 cup water
  • 4 tablespoons butter
  • 1 tsp. lemon juice
  • 1 tsp. fleur de sel or kosher salt

    Toast the pumpkin seeds in a skillet until they start popping. Line the bottom of a buttered 8-inch square glass pan with buttered parchment paper. Spread out the toasted pumpkin seeds on top of the parchment in the pan.

    In the saucepan, combine the cream, pumpkin puree, and the spices. Heat it until warm, but do not let it boil. Remove from heat.  

    In a medium heavy-bottomed pan, combine the sugar, maple syrup, and water. Stir until the sugar is melted. Allow it to boil until it reaches 244 degrees (the upper limit of "soft ball" point on a thermometer). Add the cream and pumpkin mixture, and stir gently until incorporated. Allow this mixture to boil and bring it to 240 degrees on the candy thermometer. This is the part that takes time, around 30 minutes, so be patient and watch it carefully, stirring often so it doesn't burn, particularly in the last stages when it gets very thick.

    Once it has reached 240, remove it from heat and stir in the butter and lemon juice swiftly, stirring well until both are fully incorporated and butter is melted. Now immediately pour the caramel into the pan, all in one go, on top of the pumpkin seeds. Let it cool about 30 minutes and if you wish you can sprinkle the salt on at this stage (or wait later and individually sprinkle salt on each square once they are cut). Wait at least 2 hours for caramel to fully set before slicing. Use a hot knife to slice them more easily, cutting them into 1-inch squares. You can wrap them individually in waxed paper. 

    Be careful, they are SO addictive!!


September 30, 2012

Rye Berry Salad

This summer I fell in love with a field of rye.


As you can see in the video, on golden summer evenings when the sun would hit it a certain way, the whole field seemed to glow and the tall stalks would come alive in the wind. Along with falling in love with this rye field, I also fell in love with a song. When I first heard the Christian Löffler track that you hear in the video, thanks to a friend who posted it on facebook, I had the same tingly feeling as when I was walking in that field of rye at sunset and I was thrilled when Ki Records very kindly allowed me to use it. 

We harvested the rye in late July, thanks to a combine that was on loan from a Boston company keen on getting farmers to try out their new imported models of compact smaller-scale combines.


Photo by Cindy Beams

I recently wrote an article about grains for the fall issue of Edible Toronto magazine, which you can read by clicking here. The gist of the article, if you don't have time to read it, covers  my hesitations about grains in light of warnings from some nutritionists about the darker sides of the cereal family (namely sky-rocketing gluten intolerance rates and the woes of phytic acid).

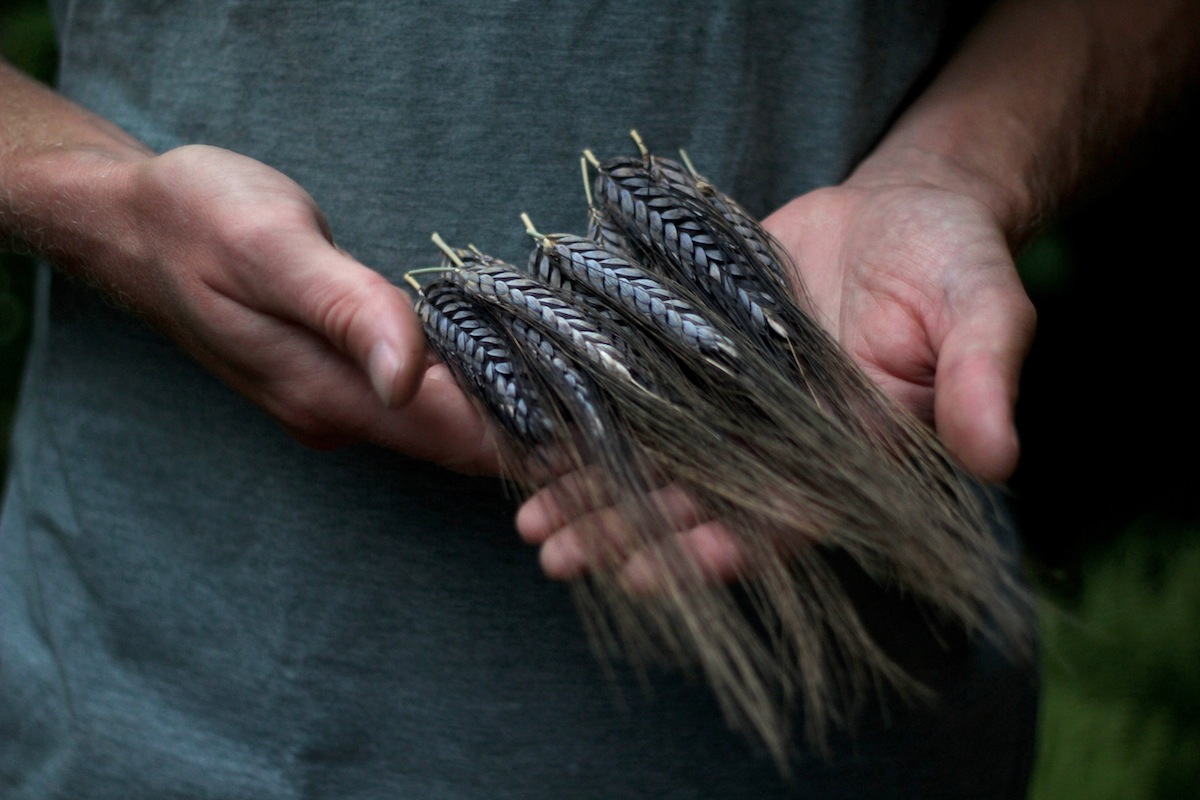
What I discovered while doing research for this article, which I found utterly fascinating, is the link between gluten-intolerance  / Celiac's disease and modern wheat varieties. Since the 1950's, wheats have been bred by the agricultural industry to maximize yield. But along the way, this has inadvertently affected the wheat's gluten proteins. Many studies are now pointing to modern wheat breeding methods as the cause of the 400% rise in Celiac's disease over the past 40 years. After reading about this, I became all the more interested in the rare, heirloom grain varieties that my boyfriend is growing out, such as the dashingly elegant Black Winter emmer, the sturdy Rouge de Bordeaux wheat, and the tall proud sorghums.


Heirloom grain varieties may in fact be much better for our health and digestion. They are often better adapted to local soils and climates. And growing them can be of great service for the biodiversity of our planet, since many older grain varieties are going extinct because they are no longer being grown. Over the past century alone, 75% of our agricultural crops have gone extinct. We often hear about endangered animals like pandas and tigers, whose plight is of great importance. But what about the disappearing agricultural species whose unique flavours will never be experienced again? 


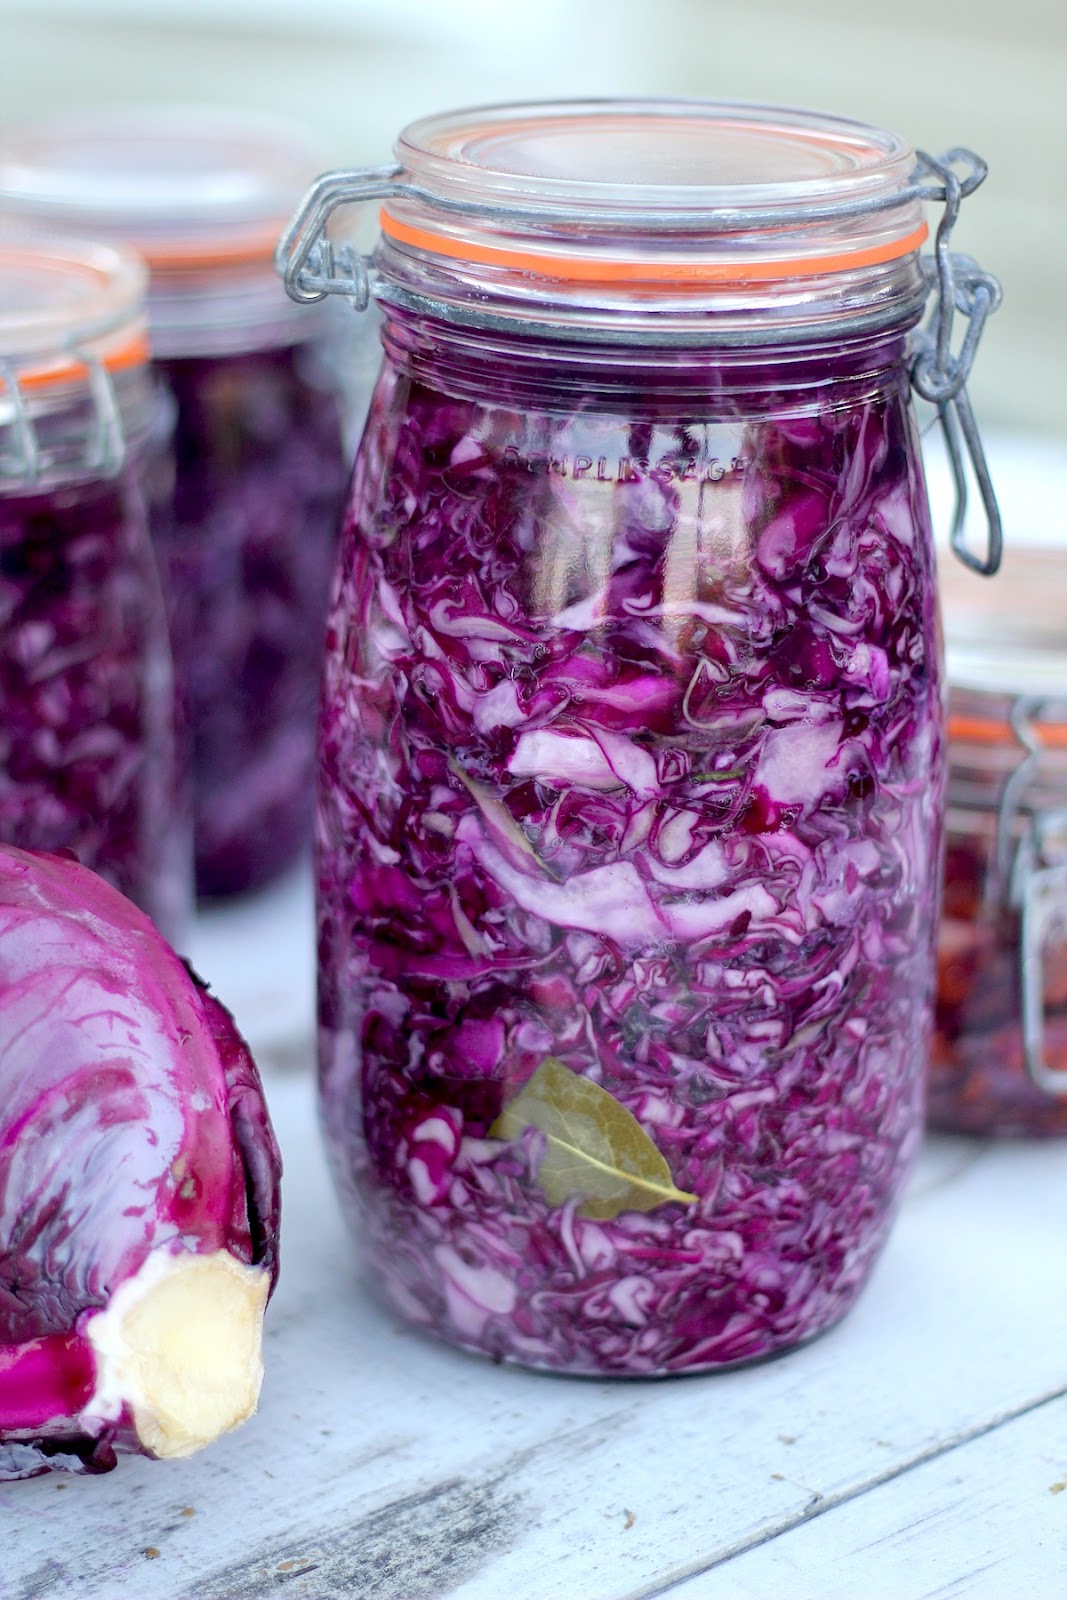
The other thing I learned about is phytic acid, a substance in grains that prevents our bodies from properly absorbing their nutrients. Although I own a copy of Nourishing Traditions, the cult classic book by nutritionist Sally Fallon, I never gave it a proper read until I was writing this article. Fallon has documented how cultures around the world and throughout history have often soaked or fermented their grains before cooking them. This process activates phytase, an enzyme that breaks down phytic acid and helps us to better digest grains and assimilate their nutrients and vitamins. Fallon advocates soaking grains in water to which a small amount of yoghurt, lemon juice, or vinegar has been added.

This rye berry salad was my first try at cooking grains using this method. And the results were wonderful. Soaking the grain berries this way made them chewy, tender, and tasty. Since then, I have tried other recipes from the cookbook and made soaked flour muffins and pancakes (you soak freshly ground flour in water with whey or yoghurt for 24 hours) and so far I'm loving it. 

I hope you'll try this salad. The rye berries can be substituted for wheat, spelt or any grain berries of your choice. Please modify the rest of the ingredients according to your preferences and what is seasonally available in your area. Have fun and bon appétit!


RYE BERRY SALAD
Note: The general rule for the preparation of grains for optimal digestibility and nutrient absorption is to soak them in twice their volume of water, adding 2 tablespoons of an acidic medium per cup of grain. The acidic medium should ideally be yogurt, kefir, whey or buttermilk but apple cider vinegar and/or lemon juice can also be used.


Rye Berries
1 1/2 cups rye berries
3 tbsp plain yogurt (see Note, above)
1 tsp sea salt or kosher salt

Salad
Juice & zest of one lemon
1 tbsp unfiltered apple cider vinegar
1 tsp Dijon mustard
1/3 cup extra virgin olive oil
1 tsp pure maple syrup
1 clove garlic, minced
Sea salt or kosher salt, to taste
Freshly ground black pepper, to taste
1 cup shredded cooked organic chicken
2 to 3 ears of sweet corn, steamed, kernels removed
1 small zucchini, thinly sliced
1 shallot or small red onion, finely diced
4 ripe figs or seasonal local fruit, chopped
3/4 cup toasted walnuts
1/2 cup dried cranberries
1 small bunch basil, stemmed and chopped 

In a large bowl, add the rye berries, yogurt and water. Stir well to combine. Let soak for a minimum of 7 hours or up to 24 hours. Drain and rinse the rye berries. (You can cook them in the soaking liquid if you wish.) Bring the berries and about 5 cups of water to a boil. Remove any scum that rises to the surface. Stir in the salt, reduce the heat, and simmer until the rye berries are the desired tenderness, about 45 minutes. Drain the rye berries. Transfer the rye berries to a large bowl. Cool to room temperature. They are now chewy, flavourful little bundles of nutrients, all ready to use!

In a small bowl, whisk together the lemon juice, vinegar and mustard. Slowly whisk in the oil. Whisk in the maple syrup and garlic. Add salt and pepper, to taste; set aside. In the large bowl with the rye berries, add the chicken, corn kernels, zucchini, shallot, figs, walnuts, cranberries, basil and lemon zest. Stir well to combine. Stir in the vinaigrette. Taste and adjust seasonings as needed.


September 19, 2012

Easy Ruby Sauerkraut (In a Jar!!)


Part of me was sad when it came time to actually make something with our cabbage because it meant I could no longer take photos of it.


For a few glorious days, I was the red cabbage paparazzi, following their every move, shooting them from every angle. I mean. What more photogenic vegetable is there? I was all the more attached to them because we grew these babies from seed so I've watched them from their infancy as delicate seedlings that survived a sopping wet spring, to their remay-blanketed childhood, in our best attempt to protect them from rapacious flea beetles. On more than one occasion, we delivered them from a lambsquarter take-over. 


They made it through their parched adolescence under a scorching July, and then one day in late August, there they were, all grown up and screaming to be harvested.


This summer I succumbed to the lacto-fermentation craze, took a workshop, and learned how to make the most easy sauerkraut recipe I've come across. I also learned that you can pretty much throw any veggies in a jar with the right amount of salt (or in some cases a salt & water brine) and watch the fermentation miracle unfold. After the workshop we promptly bought Sandor Katz's new book "The Art of Fermentation" (known by fermentation fanatics and Katz groupies as THE BIBLE) and now the sky is the limit. We have got a couple dozen jars of various veggies bubbling away on our shelves, everything from cauliflower and carrots to dilly beans, pickled cukes, peppers, and the queen of the pack...  ruby kraut.


The fabulous thing about this kraut-making technique is how simple it is. Although I love sauerkraut, the idea of preparing it never really appealed to me. It seemed complicated somehow and I pictured large, hard-to-find vats filled with stinky cabbage in a dark basement with random objects pressing it down. The possibility of having to scoop mould off the top (even though I know it's harmless) didn't exactly get my blood pumping either. 

Enter: The Jars. Ta dah! 

I don't really know how to describe these jars other than to say you know, the French ones with the rubber gaskets and metal clasps. I'm sure you've seen them. A few companies make them including Le Parfait and Fido. And no, I don't just love these because they're French. What these jars will do that other jars won't, is seal your ferments so they don't get mouldy, while at the same time, allowing excess fermentation gases to escape so the glass won't shatter from the built-up pressure once the bubbling begins. However, you must obey the cardinal rule: NEVER, EVER open the jar unless you are ready to eat what's inside (that means no peeking peekers!) The jars are pricey but well worth the investment and if you have some older ones lying around or find some at a yard sale, you can always replace the rubber gaskets (you can order them here).


Why is it called lacto-fermentation? No, there's no milk involved, only vegetables and salt. But one of the by-products of fermentation is lactic acid, which not only preserves the veggies but promotes the growth of healthy bacteria in our guts. In other words, you don't need to buy expensive probiotic supplements, you can grow them yourself, in a jar! Fermentation has been going on in one way or another in all cultures around the world, since long before freezing and canning became the preferred ways to preserve food. The fermentation process enhances the digestibility and nutrient content of food. And since no heat processing is involved, the raw enzymes are left intact. In 2002, The Journal of Agricultural and Food Chemistry published a study showing that a compound in fermented cabbage helps prevent the growth of cancer. 

But here is my favourite thing about lacto-fermentation. Unlike canning, which can take hours because of all the sterilizing and boiling, preparing foods for fermenting can take mere minutes since botulism and other toxic bacteria are not a concern, as the marvellous Sandor Katz explains in this video. Lacto-ferments are teeming with good microbes, which crowd out the harmful bacteria, so it is truly a LIVING and life-giving food.


RUBY SAUERKRAUT (RED CABBAGE KRAUT)

5 lbs red cabbage
3 tbsp sea salt or pickling salt (NO table salt)
Your choice of optional add-ons: 2 tbsp juniper berries or 2 tbsp caraway seed or a dozen large dried bay leaves)

Remove the part of the cabbage you won't use (outer leaves, stem, etc...). Weigh the cabbage to get 5 lbs. If you have more or less, make the appropriate calculation so the salt ratio stays the same. 

Slice / shred your cabbage adding salt as you go and throwing everything into a large mixing bowl. Once all the cabbage is shredded and salt incorporated, add your optional flavourings (juniper berries, caraway seeds, or bay leaves). 

Stuff the seasoned shredded cabbage into clean metal-clasp jars such as Fido or LeParfait. (You don't need to sterilize the jars like you do in canning, but they should be perfectly clean). Press the cabbage down as much as you can. You can even pound it a bit with the end of a rolling pin to get more liquid out. After pressing it down repeatedly, the cabbage will produce enough juice to submerge the kraut. Once this has happened, take an intact cabbage leaf and place it on top of the cabbage, pressing down. This will help the shredded cabbage stay under the brine. Wipe the rim and close your jar. 

Leave the jar at room temperature for about a week and then move it to a cooler place such as a basement. It should be ready to eat within a month and will keep for up to a year or longer. Do not under any circumstances open the jar until you are ready to eat your kraut!

*****

I would love to hear in the comment section below from people who have tips, techniques, and favourite recipes for kraut and other ferments...  For instance I've heard that a grape leaf placed on top of the kraut before closing the jar will give your kraut some extra crunch. Happy krauting everyone!


Easy Ruby Sauerkraut in a Jar on Punk  
Domestics