
Part of me was sad when it came time to actually make something with our cabbage because it meant I could no longer take photos of it.

For a few glorious days, I was the red cabbage paparazzi, following their every move, shooting them from every angle. I mean. What more photogenic vegetable is there? I was all the more attached to them because we grew these babies from seed so I've watched them from their infancy as delicate seedlings that survived a sopping wet spring, to their remay-blanketed childhood, in our best attempt to protect them from rapacious flea beetles. On more than one occasion, we delivered them from a lambsquarter take-over.

They made it through their parched adolescence under a scorching July, and then one day in late August, there they were, all grown up and screaming to be harvested.

This summer I succumbed to the lacto-fermentation craze, took a workshop, and learned how to make the most easy sauerkraut recipe I've come across. I also learned that you can pretty much throw any veggies in a jar with the right amount of salt (or in some cases a salt & water brine) and watch the fermentation miracle unfold. After the workshop we promptly bought Sandor Katz's new book "The Art of Fermentation" (known by fermentation fanatics and Katz groupies as THE BIBLE) and now the sky is the limit. We have got a couple dozen jars of various veggies bubbling away on our shelves, everything from cauliflower and carrots to dilly beans, pickled cukes, peppers, and the queen of the pack... ruby kraut.
The fabulous thing about this kraut-making technique is how simple it is. Although I love sauerkraut, the idea of preparing it never really appealed to me. It seemed complicated somehow and I pictured large, hard-to-find vats filled with stinky cabbage in a dark basement with random objects pressing it down. The possibility of having to scoop mould off the top (even though I know it's harmless) didn't exactly get my blood pumping either.
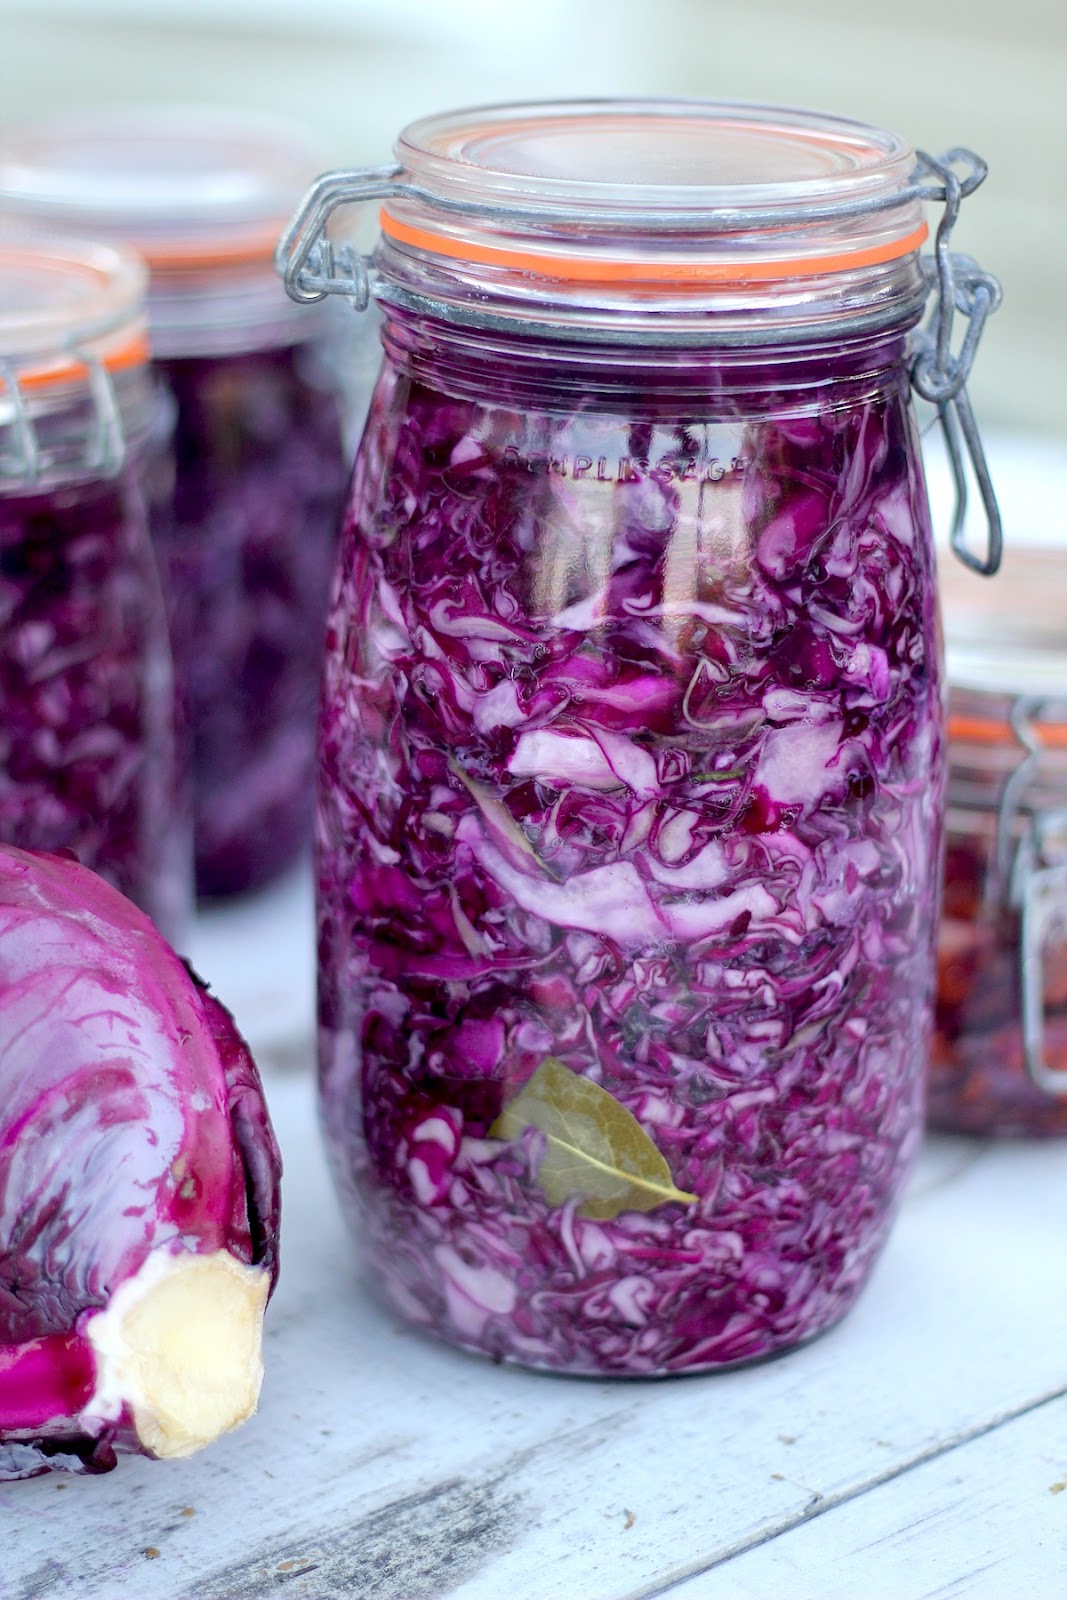
Enter: The Jars. Ta dah!
I don't really know how to describe these jars other than to say you know, the French ones with the rubber gaskets and metal clasps. I'm sure you've seen them. A few companies make them including Le Parfait and Fido. And no, I don't just love these because they're French. What these jars will do that other jars won't, is seal your ferments so they don't get mouldy, while at the same time, allowing excess fermentation gases to escape so the glass won't shatter from the built-up pressure once the bubbling begins. However, you must obey the cardinal rule: NEVER, EVER open the jar unless you are ready to eat what's inside (that means no peeking peekers!) The jars are pricey but well worth the investment and if you have some older ones lying around or find some at a yard sale, you can always replace the rubber gaskets (you can order them here).
Why is it called lacto-fermentation? No, there's no milk involved, only vegetables and salt. But one of the by-products of fermentation is lactic acid, which not only preserves the veggies but promotes the growth of healthy bacteria in our guts. In other words, you don't need to buy expensive probiotic supplements, you can grow them yourself, in a jar! Fermentation has been going on in one way or another in all cultures around the world, since long before freezing and canning became the preferred ways to preserve food. The fermentation process enhances the digestibility and nutrient content of food. And since no heat processing is involved, the raw enzymes are left intact. In 2002, The Journal of Agricultural and Food Chemistry published a study showing that a compound in fermented cabbage helps prevent the growth of cancer.
But here is my favourite thing about lacto-fermentation. Unlike canning, which can take hours because of all the sterilizing and boiling, preparing foods for fermenting can take mere minutes since botulism and other toxic bacteria are not a concern, as the marvellous Sandor Katz explains in this video. Lacto-ferments are teeming with good microbes, which crowd out the harmful bacteria, so it is truly a LIVING and life-giving food.

5 lbs red cabbage
3 tbsp sea salt or pickling salt (NO table salt)
Your choice of optional add-ons: 2 tbsp juniper berries or 2 tbsp caraway seed or a dozen large dried bay leaves)
Remove the part of the cabbage you won't use (outer leaves, stem, etc...). Weigh the cabbage to get 5 lbs. If you have more or less, make the appropriate calculation so the salt ratio stays the same.
Slice / shred your cabbage adding salt as you go and throwing everything into a large mixing bowl. Once all the cabbage is shredded and salt incorporated, add your optional flavourings (juniper berries, caraway seeds, or bay leaves).
Stuff the seasoned shredded cabbage into clean metal-clasp jars such as Fido or LeParfait. (You don't need to sterilize the jars like you do in canning, but they should be perfectly clean). Press the cabbage down as much as you can. You can even pound it a bit with the end of a rolling pin to get more liquid out. After pressing it down repeatedly, the cabbage will produce enough juice to submerge the kraut. Once this has happened, take an intact cabbage leaf and place it on top of the cabbage, pressing down. This will help the shredded cabbage stay under the brine. Wipe the rim and close your jar.
Leave the jar at room temperature for about a week and then move it to a cooler place such as a basement. It should be ready to eat within a month and will keep for up to a year or longer. Do not under any circumstances open the jar until you are ready to eat your kraut!
*****
I would love to hear in the comment section below from people who have tips, techniques, and favourite recipes for kraut and other ferments... For instance I've heard that a grape leaf placed on top of the kraut before closing the jar will give your kraut some extra crunch. Happy krauting everyone!

I'm excited to try this, but what do you do with the water called for in the ingredients?
ReplyDeleteThanks for pointing that out! I just removed it (I think I had another fermented veggie recipe on the brain at the time I wrote out the recipe, some veggies need water and salt brine because they don't make enough juice to brine themselves)
DeleteYou can also just use regular wide mouth canning jars (I like the 1/2 gallon size) with the plastic tops you buy separately. I'm actually surprised those wire top ones let out the gasses that need to escape.
ReplyDeleteVery cool! I did not know you could use those. Do you mean the Tattler lids?
ReplyDeleteCool and new thing here I found.
ReplyDeleteTrying this tonight!
ReplyDeleteI don't see how this would let the excess fermentation gases escape. I think the rubber gaskets are pretty airtight -- even if they are slightly porous, I'm willing to bet that they release gases on the order of over a course of months rather than days. I could definitely see this glass shattering if enough fermentation got going.
ReplyDeleteA much better solution (ha - solution -- pun not intended) IMHO is to buy a fermentation lock wherever beer brewing supplies are sold, and a small rubber gasket that's the same size as the bottom tube of that fermentation lock. Take a large-enough mason jar and the appropriate size lid - drill a hole big enough for the fermentation lock, insert the gasket into the hole, insert the fermentation lock (filled with water) into the gasket, and voila, CO2 escapes and air does not get in.
See a much better description, with pictures, here: http://www.picklemetoo.com/2012/03/12/diy-airlock-system-for-lactofermentation/
DeleteThat is indeed a very cool system, I hear a lot of people are using it now. The glass jars I use are not to be confused with regular mason jars, which may indeed shatter - these ones are the french style which have thicker glass and the rubber gaskets & metal clasps release just enough gases to keep the jars from shattering - the teacher who taught the workshop I attended has been using this technique (simply fermenting directly in the jars) for many years with a pantry full of every imaginable ferment and has never had a jar break. So I feel quite confident using this technique. That said, the airlock system is pretty slick indeed! Thanks for sharing :-)
DeleteI am really pleased to hear about the workshop. I too thought not enough air would escape as it ferments but you explained it so well using the French style jars (I have one large jar).
DeleteYes the airlock system does sound clever heh!
I made Kimchi a few weeks back and it was wonderful:
http://www.fortheloveoffoodblog.com/2012/03/homemade-kimchi.html
So am thinking perhaps a combo of both recipes to try. Here in Nova Scotia we have Tancook Island Sauerkraut readily available in shops but it is nice to try your own especially when you have the cabbage in your own garden. How wonderful is that!! Great video.
i've been adding strained whey from my homemade buttermilk to your fabulous bread recipe. for me there's the benefit of fermented bread,the lactic acid breaking down the phytic acid and starches, and i think it has a little more tender crumb as i understand the fermenting breaks down the gluten, but still has that beautiful crispy crust
ReplyDeleteor i have also used leftover sauerkraut juice in the bread
DeleteHow many jars (and of what size) did you get out of 5lb of cabbage?
ReplyDeleteHi Sara, I only just now saw this question, so sorry. This is waaaay after the fact, but this recipe makes about 1 gallon of sauerkraut. So that would be 3 x 1 litre jars + 1 x .75 litre jar (http://www.leparfait.com/le-parfait-super-jars)
Deletewooww...impressive. Thanks for your rare ideas !
ReplyDeletecandy jars
cake stand
Pretty remarkable post. I simply came across your blog and desired to say that I have really enjoyed searching your blog posts.
ReplyDeletehow to make sauerkraut
Beautiful post l and i must say seven days later
ReplyDeleteyummy and crunchy!!
ready to make my next batch!
Why you can not use table salt?
ReplyDeleteHi Teodora, great question. Table salt is usually iodized and iodine tends to inhibit the beneficial bacteria needed to achieve good fermentation with vegetables, so it's not recommended. Sea salt or pickling salt are ideal :)
DeleteI absolutely adore when people use ruby red cabbage to make sauerkraut! the color is so intoxicating and beautiful to see. On a plate, or even as a condiment, its great to see red sauerkraut. Thanks so much for sharing your recipe! Can't wait to make my next batch!
ReplyDelete